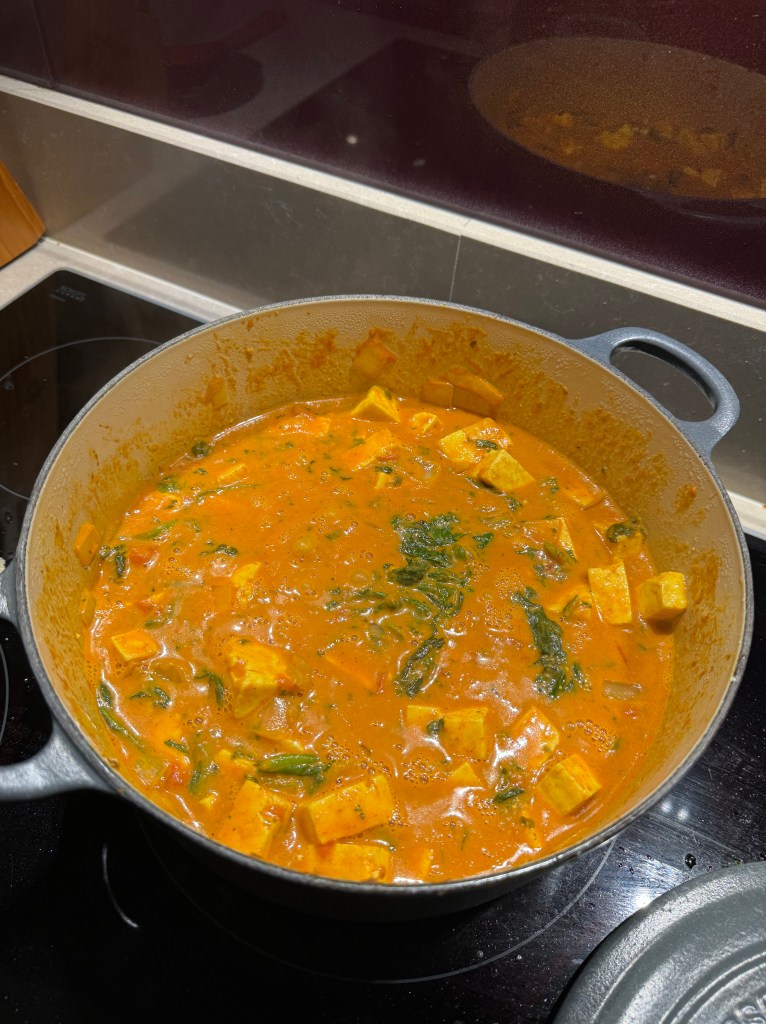
Saag Paneer (or something close!)

A generous four portions! 
Ingredients:

One tablespoon of coconut oil

One block of Costco paneer, cut into cubes (or two blocks of standard supermarket size)

One onion, diced

Two cloves of garlic, squished

Four tablespoons (or to taste) of curry paste (korma is nice – make sure it’s a paste, not a jar of sauce(

One tin of tomatoes

One tin of coconut cream

Spinach (one tin, or about 8 frozen blocks, or about a metric tonne of fresh spinach -if using fresh I recommend pre-cooking and squeezing out some of the water so that your curry is not too saucy)

Any other veg you fancy

Method: 

Over a medium heat, gently cook the onions. Add the paneer and stir – be careful it doesn’t stick. Stir through the curry paste and cook for a few mins. Add the garlic. Throw in your tomatoes and coconut cream, then the spinach. Leave to simmer gently for 10-15 minutes to reduce a bit. 

Serve over rice or with fresh chapatis (or both). 

(Chapatis are really easy: Chapatis recipe | BBC Good Food)

Freezer Fajitas

I absolutely love Mexican food. Fajitas have been for some time an emergency stand-by of mine – easily rustled up, including prep, in about 20 mins. I’ve started cheating a bit, though, by keeping some of the ingredients in the freezer – which make it even quicker! It’s easy to find chopped red onions, mixed peppers and garlic in the freezer cabinet of your local supermarket. That saves on all the chopping; I also think it saves on waste as you don’t end up with a sprouting onion in the back of your fridge. Freezer ingredients is a theme I’ll come back to, as it’s as good as fresh and it saves a lot of time and hassle!

Serves 2, but easy to double!

Two chicken breasts (or your choice of protein; steak, quorn, prawns, whatever), in bite sized pieces (don’t bite it yet, it’s not cooked at this stage!)

Two serving spoons of frozen red onion

Two serving spoons of frozen mixed peppers

Two teaspoons frozen garlic

One tablespoon of olive oil (or your choice of oil)

Two teaspoons of ground cumin

One teaspoon of oregano

One teaspoon of chilli powder (or to taste!!!)

Quickly fry the chicken in the oil, flipping regularly to make sure it’s cooked on each side. As it starts to go brown, add the garlic, chilli and cumin. Stir throughly, then add the onions and peppers. Keep stirring every minute or so. Once it’s close to cooked, add the oregano. That’s about it, really!

If you want to level up, a squeeze of lime juice (you can keep Jif lime or equivalent in the fridge), a splash of Worcestershire sauce or a splash of soy sauce (or all three) can be added when the veg goes in.

Serve with tortillas (make sure you warm them, it makes a huge difference) or rice, grated cheese, hot sauce etc. Oh, and a cold Corona with a tequila chaser!

Roquey Gnocchi

I make no apologies for combining Italian and French delicacies here as it’s blooming tasty. So Jo has started eating sheep’s milk (mainly cheese but when we were in France we found sheep’s yoghurt). Probably the most full-flavoured of these is roquefort, one of my favourites – so I concocted a quick dinner with some tinned beans, some veg and some gnocchi we had in the fridge. Here goes (serves 2 with leftovers or would stretch to 4):

One bag of gnocchi
Various ‘Mediterranean’ vegetables – courgettes, peppers, red onions etc
Tin tomatoes or passata
Tin cannelini beans (or chickpeas etc)
Garlic cloves x 2
A dessert spoon of sundried tomato paste
Mixed herbs or dried oregano and basil
Some olives
A bit of roquefort to taste

Roast the veggies in the oven at about 180 (fan oven) for about 20 mins (Quick tip: the Co-op does a great prepared bag of courgette, red onion and pepper which is perfect here).
Meanwhile, chuck a bit of olive oil in a pan and add the garlic. Cook for a min or two, careful not to brown the garlic of course! Add the tomatoes, herbs, paste etc (and a splash of red wine if you have some open), and cook down for about 15 minutes. Add the olives, throw in the roasted veg and stir. You don’t need to cook any longer once the veg is in. I love this ratatouille style of cooking this – if you cook the veg in the sauce you lose some crispness and a bit of caramelisation. Leave it to sit while you cook the gnocchi according to the packet – probably two minutes in boiling water.

Pile the sauce, which should be thick and chunky, over the gnocchi, and crumble as much or as little roquefort over the top. It’s very strong in flavour so I suggest you start small and work uo from there.

This is what it looks like – hope yours is as tasty as mine was!
IMG_2127

How do you make a vegan crumble?

Offer her a bacon sarnie! Just joking, of course – but I did manage to bash together a crumble type affair that was enjoyed by all of us. The topping (I guess as it uses marge rather than butter, or maybe because I did it in a food processor) is a bit more biscuit than crumble, but it works really well. Here goes – makes about six portions:

crumblepie

Three desert apples (Pink Lady works well – or coxes, but use four as they are smaller)

A selection of berry fruits – strawbs, raspberries, blueberries, blackberries – you don’t need a load but it improves the flavour and dyes the apple a beautiful colour.

One heaped tablespoon of Demerara sugar

175g plain flour

175g ‘free from’ spread (I used Sainsbury’s as they have a decent free-from selection)

100g caster sugar

Peel and slice the apple and place it in an oiled dish. Throw the berry fruits on and squash down a little. Sprinkle with the Demerara sugar.

Blitz the flour and the spread in a food processor, then add the sugar and mix well. Spread the resulting mixture over the top of the fruit and bake for about 30 mins at 180 degrees.

That’s it! Really easy. Works well cold the next day also.

Jolly Jogging Jon’s Wellington BBQ Chicken

This recipe is credited to a chap called Jon, who lives down my street. We went camping at Wellington Park recently with a load of the families down our road, and we found out that some of the kids refer to him as Jolly Jogging Jon – he does jog pretty much every morning and when he is not being chased into the Thames by big scary dogs he is indeed very jolly!

Anyway, as usual when camping I ended up running the BBQs, in the rain… I had three on the go at one point and was referred to as ‘the Jean Michelle Jarre of BBQing’ which entertained me. One of the items I was looking after was some amazing chicken which it turned out Jon had prepared himself. It was literally one of the best BBQ items I have ever tasted. In lieu of payment for the beer he drank, I accepted a guest post for this blog – so, here, for your delight and delectation, is Jolly Jogging Jon’s Wellington BBQ Chicken. I tried it myself this weekend and it was every bit as good as the original – highly recommended:

Spicy Wellington Chicken for the BBQ
A particularly tasty, spicy chicken recipe for the BBQ.  Deliciously moist, and best eaten outdoors.

Ingredients:
12 boneless, skinless chicken thighs (don’t be tempted to use breasts as the end result will be less succulent, and definitely don’t use chicken pieces with the skin left on – they simply don’t absorb the marinade as well; buy ones with the longest shelf life for a really fresh chicken taste to complement the marinade)

Marinade:
A good slug of olive oil (the mild type is fine)
A tablespoon of tomato puree
Half a tablespoon of tomato ketchup
Half to three quarters of a bulb (yes, bulb, not clove) of garlic, peeled
A tablespoon of mango chutney (plain variety, not one with whole spices as these could disrupt the spice balance)
A tablespoon of smoked paprika (must be the smoked variety; hot smoked paprika is fine but watch the chilli)
Fresh chillies to taste, seeds’n’all (for the usual supermarket varieties, about 3 or 4 gives a good kick)
Juice from half a lemon
1 teaspoon of ground cumin
2 generous teaspoons of medium or hot curry powder
1 tablespoon of light soy sauce
A dash of balsamic or sherry vinegar (this is optional but adds a tang and helps the lemon juice tenderise the meat)
Yellow or red food colouring (this is optional; sadly, this does give the best results and if you want to keep it natural and please insectetarian guests, use a cochineal-based red colouring.  Don’t be tempted to use turmeric for yellow colouration as with the curry powder it imparts too much of an earthy taste that will disrupt the spice balance)
One and a half Oxo Chicken Stock Cubes (yes, I know this sounds like you’re cheating, but it really draws all the other tastes together)
Black pepper

Method:
Put the marinade ingredients in a food processor, then whizz until almost smooth.  Taste (no raw chicken yet so quite safe to taste) and add more salt or chilli in the form of cayenne pepper, to taste.  You may not need to add any salt because of the stock cube and soy sauce.  Put the chicken in a food grade sealable plastic bag (such as the ones you buy for the freezer) or a non-metallic bowl, add the marinade, mix well and leave in the fridge to marinate for about 24 hours.  Alternatively freeze straight away and defrost before use.  BBQ over hot coals (you want to caramelise some of the sugars, e.g. from the chutney, in the marinade and seal the chicken quickly to keep it moist) but don’t blacken it or dry the chicken out.  Enjoy!

Sausages in cider

This post is dedicated to two different people who, in different ways, inspired this dish which I whipped up for Iris (and me!) last night.

First person: I used to play bass in rock bands (something I’d love to find the time to do again!). The first band I played in, Innocence (in a sense), featured a slightly mad drummer called Tom. He used to live a bit out in the sticks, so I’d head round there, we would jam and try and steal his dad’s collection of Belgian beers. His mum was a great cook, and would feed us while we were playing. I used to love a sausage casserole she made, probably helped by the fact that the name of the dish was amusing to y 15 year old brain (still is, if I am honest!) – this is my attempt at replicating it.

The other dedicatee (that word didn’t get spell-checked, which is a shame as I thought I had invented it) is a chap called Greg who lives over the road from me. We went round to his house for NYE and he had acquired 20 litres of Haymaker, a magnificent Welsh cider (Greg’s from Wales originally). For some strange reason, we didn’t finish it that night and (for some even stranger reason) Greg has decided not to drink for the rest of January, so I am currently the proud custodian of the remaining 5 litres or so.

Anyway, on with the recipe. Obviously you can make this meaty or otherwise depending on the sausages you use. Whichever you go with, make sure they are decent quality – and you want simple, pork sausages, not something crazy like wild boar and marmite flavour. Veggie ones – the Cauldron range would work well here I think. Serves fourish depending on how hungry you are; it doubles pretty easily if you need.

1 tablespoon or so of olive oil

6 sausages

3 large shallots

1 punnet mushrooms

2 tablespoon of flour

1 pint medium cider

half a pint of hot water

Brown the sausages in the oil first (leave them whole for this bit – for some reason they don’t seem to brown as well once chopped up). Then turn the heat down a bit, and cook the shallots and mushrooms in the same pan. Take the sausages out and cut then into chunks (NOTE THEY WILL BE HOT AND FULL OF HOT LQUID – BE CAREFUL!). Chuck them back in the pan, turn the hear right down and stir in the flour. It will probably all clump up a bit but don’t worry. Cook it gently for about 30 secs, then pour the cider in bit by bit (keep stirring) and increase the heat. Once it’s gently bubbling, add the hot water. Leave it gently bubbling away for about 30 mins or so, stirring every few minutes. It should all thicken up nicely. Serve it with some rice or mashed potato and some nice steamed veggies on the side.

If you want to jazz it up a bit, some thyme or a spoon or two of whole grain mustard works well. I left this stuff out for Iris’s sake but chucked some mustard into mine. Nice.

A fine winter warmer – and all the alcohol from the cider boils off so even if you are doing Dry January, you will suffer no cider-fects (sorry!).


Pissaladiere (ish)

Did you know Jus-Rol pastry doesn’t have any dairy in it? Useful to know. I cooked Beef Wellington for a Christmas meal with my family on the 30th, using all-butter pastry but made Salmon Wellington for Jo using Jus-Rol. I had some sheets of pastry left so I knocked up a quick canapé type thing with it for a NYE party we went to. It’s based very loosely on a recipe I saw ages ago for something called “pissaladiere’ and always fancied doing. This is as easy as making pizza from a base, and you can vary the toppings according to your audience (vegan, vegetarian, or omnivore!). I believe the ‘true’ pissaladiere is filled with very slowly cooked and caramelised onions and then criss-crossed with anchovies, hence the ‘ish’.

Take a sheet of puff pastry, place on some baking parchment on a baking tray. Score with a sharp knife all the way round about half an inch in from the edge – this will let the outside puff up while the middle is held down by the topping.

Brush the middle area with sun-dried tomato puree, and then arrange some asparagus spears, halved lengthways, in a criss-cross pattern over it. Add some roasted peppers or cherry tomatoes or both.

Bake in a preheated oven according to the pastry instructions or at 180 for about 15 minutes.

Some good variations are swapping the sun-dried tomato puree for pesto (vegan if necessary), or adding some sliced mozzarella or goats cheese (obviously no longer vegan!). I’m a fan of draping some anchovies over as well but that’s not to everyone’s taste!

Slice it into pieces – small for canapés or if you wanted you could serve larger pieces with a dressed salad for a starter or a light lunch.

I would have included a photo but it went too quickly! Sorry!

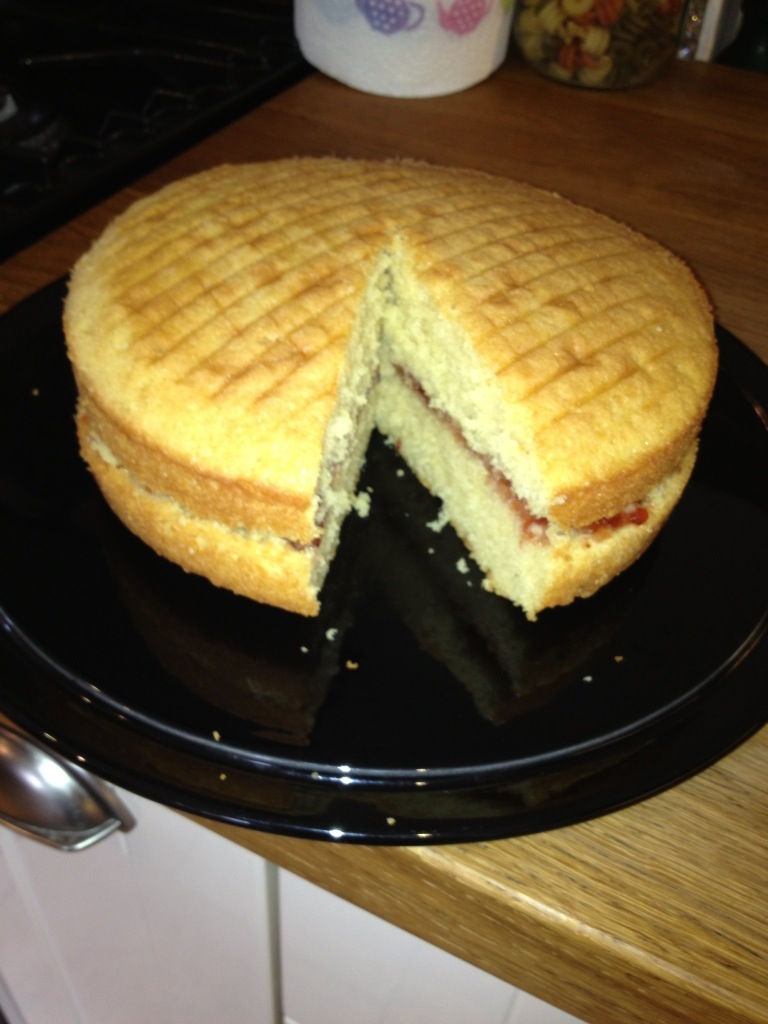
Finally nailed Victoria Sponge…

I’ve been trying for ages to make a decent Victoria Sponge. It’s a classic, and nothing (apart from maybe a scone with jam and clotted cream!) goes better with a cup of tea. Unfortunately, I’ve not managed up until now to get it to rise properly – it tasted great but was a bit dense. I made a couple of changes this time which made all the difference – I sifted the flour and the sugar to let a bit more air in, I blasted it with an electric whisk, and I cooked it a bit lower. Seemed to work, it’s the best yet!

200g self-raising flour
200g caster sugar
1 teaspoon baking powder
A good splash of vanilla essence
4 eggs
200g Sainsbury’s free-from spread or equivalent, softened
2 tablespoons of milk (rice, almond, soya etc)
Strawberry jam (or another fruit if you prefer!)

Turn your oven on – 170 for a fan oven, about 180 for a normal one. Sift the flour, baking powder and sugar into a bowl. Beat the eggs separately and then add in. Add the softened spread, milk and vanilla and blast with an electric whisk (mix it in a bit first to make sure you don’t spray the kitchen with flour!).

Divide into two greased round cake tins and bake for about 20 minutes. I guess you could do one large one and slice it to jam it but you’d probably have to cook it longer. Get the cakes out of the tins as soon as you can, leave to cool, spread one with jam and stick them together. Slice and we’ve – and don’t forget your cup of tea!

20121020-141032.jpg

‘Bacon’ brownies

OK, so these aren’t actually made with bacon. I’ve called them Bacon Brownies in  honour of Sarah from my team at work. When she interviewed with us, her ever so slightly northern accent led us to believe she loved ‘bacon’ rather than ‘baking’, which was what she actually said. Anyway, she got through the interview and joined us – and decided to bake us these brownies to prove she wasn’t lying on her CV. They were excellent, so in my attempt to learn to bake I asked for the recipe – so here we go! I’ve made a couple of amendments to the original recipe (in brackets) to render it dairy-free.

Makes about 16 brownies depending on how big you cut them:

75g plain flour

50g cocoa powder

125g caster sugar

50g low fat spread (I used Sainsbury’s FreeFrom which worked perfectly) (plus a smidgen for greasing)

1 teaspoon vanilla extract (I always go heavy on the vanilla extract so a bit more wouldn’t do any harm!)

50g pitted soft prunes (next time I will soak the prunes in hot water before adding for extra moistness. Or I might try cranberries instead. Or both!)

50g Maltesers (I used 70% dark chocolate – actually works really well and lends it an ‘adult’ richness)

2 eggs

1)            Preheat oven to 180 degrees Celsius and grease a square tin (19cm) with a smidgen of the spread

2)            Sift both the flour and cocoa powder into a bowl, adding the sugar and vanilla extract

3)            Crush the Malteasers (Sarah placed them in a sandwich bag and crushed with a rolling pin) and add these to the bowl – if using the chocolate chop it finely or if you can be bothered grate some of it

4)            Chop the prunes finely and add to the bowl

5)            Melt the spread in pan and add this to the bowl along with the beaten eggs

6)            Mix thoroughly and spoon mixture into tin

7)            Place in the oven for 15-20, letting them cool for 10 minutes once removed

8)            Cut into squares and enjoy!

Thanks for your contribution, Sarah!

(photo of my brownies first, Sarah’s second)

'Bacon' Brownies

Sarah's brownies

Daddy bread

I love bread… Who doesn’t? Wonderful stuff! There’s a lot of fuss at the minute about how wheat is not necessarily the best for us, as it is so refined. Not sure about that, but I know there are a lot of people who struggle with wheat – but really miss good bread (let’s face it, most of the gluten-free stuff is not great). A little while back, I started making bread with spelt flour instead of wheat. Spelt is related to wheat, but is apparently a much more primitive and less refined grain. While it does contain gluten and is therefore of no use to coeliacs (sorry guys!), it is apparently more easily digestible and therefore some people who struggle with wheat can cope with spelt. And you know what? I reckon it’s the best bread anyway – as does Iris, who refers to it as Daddy Bread (hence the title of this post). In fact, she’ll be having a sandwich made from it in her lunch tomorrow as I’ve just finished baking a loaf! One of the major benefits for me is that it is best baked on the ‘quick loaf’ setting on your bread maker – so with mine, it is cooked literally in an hour! Fantastic. Anyway, here’s the basic recipe with some variations underneath:

450g spelt flour

1 tablespoon of sugar

1 teaspoon of yeast (one of those sachets is a teaspoon but if you are going to do this regularly getting a tin of yeast is so much easier)

1 teaspoon of salt

1 1/2 tablespoon of oil (olive works well, but sunflower/ rapeseed gives a better texture and it stays fresher longer)

400ml of warm water (try 100ml boiled to 300ml straight from the tap

Chuck it in your bread maker in that order and set it off on your shortest cycle (an hour or so ideally). Job done!

Variations:

Obviously you can take it out before it bakes (about half-way through on my machine) and make rolls – or it makes a fabulous pizza base!

I normally use wholegrain spelt flour, but you can get white spelt, which makes a lighter loaf. Any ratio of the two mixed seems to work just fine – half and half is perfect…

One of my favourites is to add in two tablespoons of caraway seeds and two tablespoons of poppy seeds. I love the flavour of caraway, and the poppy seed gives an awesome crunch.

Daddy bread

Bread made with spelt flour instead of wheat

Give it a go – it is blooming awesome!